Painting Models: Advanced Techniques
Welcome to the advanced Airfix model painting guide, designed to help you complete an enhanced build with the confidence of a seasoned veteran modeller. We’ve put together some step-by-step instructions (and a few tips and tricks) so that we can elevate your next build together! This guide is strictly for the modellers who have already been introduced to building and are now looking to advance to the next level with Airfix model painting tips. Though if you’re new to the scene, there is still plenty you can learn from this helpful guide. We have everything you need from painting prep tips to a brush breakdown!
Preparing your painting area
You’re a pro at all this by now but humour us. The first step is to assemble your workbench – your mighty modelling station. Your workbench can be anything from a desk to a dining table – you only need to make sure that it’s sturdy enough and a place no one will mind if you spill some glue or paint.
Now about your tools, this is going to differ a little from previous articles. The most important part of setting yourself up for an advanced build (and for success), is securing the right lighting. Good lighting works fine for a Starter Kit type of build, but if you’re looking to improve on the next one, you need stellar lighting. This is to ensure that you don’t miss an important detail during the painting process, as poor lighting can lead to unfortunate mistakes which often aren’t caught until you think you’re finished. As for the type of lighting, try to avoid warm, incandescent lighting as this doesn’t show colours as accurately as a neutral, white LED lamp does.
We also recommend a reliable chair and a good supply of paper towels to be ready for spills and any excess paint.
After that, assemble your self-cutting mat (the best in the business in terms of mats), glue, paints, brushes, a hobby knife, and nippers (a clipping tool designed to remove any extra plastic).
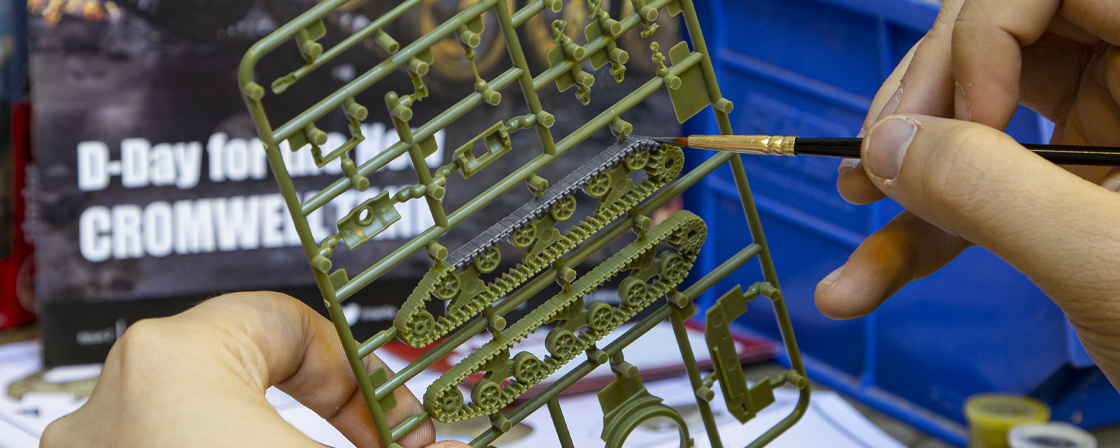
Start painting!
Finally, we’re going to give you some top tips for actually painting your models. The trick to creating a truly spectacular paint job is to know which brush works best for each aspect. The different sizes are an important distinction – the larger brushes are ideal for covering bigger surface areas whilst smaller brushes are perfect for the tiny details you need to make your model truly sing.
You also need to make sure that you’re working with the right paint for you. Our two options are acrylics and enamels – both great choices but we have found that many of our modellers tend to skew towards acrylic. This is because acrylic paints are, generally speaking, easier to apply and come in a far greater variety of colours. They also dry much quicker than enamel paints.
When it comes to the actual painting, many modellers have found it best to start by colour blocking and then adding detailing last. It’s good to start with thin layers of paint too, because it’s far easier to build it up later than it is to try to cover a thick initial layer. Thin layers help the drying process and ensure that your coats will dry smooth and even.
In terms of colours, we have found great success in colour blocking with all your dark colours first and then layering the lighter ones on top. This will give the colours on your model richness and depth that really makes your models stand out.
A decal is a decorative sticker designed to enhance the look of your model or add a bit of historical detailing that might verge on impossible to do with just a brush. The decals come on a sheet of cardboard which means you’ll need your trusty hobby knife to free them from their paper prison.
Once your decal is separated from the sheet, you place it in some warm water (almost like those temporary tattoos you used to get as a child). We recommend warm water as opposed to cold to help the decal slide off the remaining cardboard without any issues.
A tip that we have picked up over the years is to dab a little of the water onto the area of the model where your decal is going to go. This ensures that you can continue to adjust it once you have applied it to the model in case it didn’t lie as smoothly as you would have liked, or the positioning was slightly off.
To apply the decal, grab your brush and use it to pick the decal up from the cardboard and manoeuvre it carefully onto your model. A gentle hand is necessary when positioning the decal and ridding it of any air bubbles as you don’t want it to tear.
If water isn’t cutting it and you’re after something a little more permanent, we also sell adhesives made specifically to secure your decals!
Picking the right brush
Now we’re going to discuss the most important tools in an artist’s arsenal – their brushes. We’re not normally too fussy with brushes; a larger one to cover a greater surface area, a smaller one for details. However, when taking your model to the next level, it is imperative that you have the correct brushes for the job. We’re going to give you a quick breakdown of what we class as absolutely essential brushes but stay tuned for techniques further down.
· Fine detail brush (sizes 1 to 4)
A fine detail brush is important for painting the majority of smaller details on a model. They are ideal to catch the bits that a larger brush can’t handle with as much grace and sophistication. They’re also essential for steady-hand techniques such as edge-highlighting.
· Dry brush
This isn’t a fancy brush – any old one will do. They’re needed for the dry brushing technique so pick one that you’re not too attached to as things will be getting a little rough.
· Extra-fine detail brush (size 0)
These are the ideal brushes for the tiny but important details – such as insignias. They’re the perfect size to do the work that a fine detail brush can’t, with much more control and attention to detail.
Priming your model
The final bit before we move onto the painting itself, is the priming of your model. Priming is an essential step because it makes it much easier to apply multiple layers of paint. Think of priming as creating a canvas on your model. It also helps to enable a more even finish on the figure.
If you’re not sure where to purchase a reliable can or pot of primer, the Humbrol website has primer in bucketloads. Whether you’re a spray can whiz or a pot classic, Humbrol has it all. Just make sure that you’re picking the right primer for your project!
Painting the finer details
Time to get into the nitty gritty folks. Hold on to your hats because this is where it gets exciting. We’ve cleared the basics and now we apply the details. As with any precision work, a steady hand is vital for finessing the smaller details. I’m going to take this opportunity to remind you all to check that your lighting is still good as well, as this is where it’s really going to become important.
Finally, make sure that you’re confident with your paint thinning skills. You want your paint to have the kind of consistency which will avoid it running all over the place, but also thin enough that it flows over the model effortlessly. We recommend to bear slightly on the thinner side for detail work but double check that you’re happy before attempting anything you can’t take back.
Now onto our tried-and-true techniques!
· Edge highlighting
A beloved technique of many modellers is edge highlighting, where you go in with lighter colours and brush them along the edges of certain points on your figure (where the sun might hit a person). This is a great way of breathing life into your models and giving them an element of realism. Painting models is always a learning process though, even for the pros, so never be afraid to make a mistake or two!
· Dry brushing
A great tip to keep in mind is something called the dry brush technique. You apply paint to a brush and then wipe as much of the paint off on a paper towel as possible. Then, you sweep the brush over certain parts of your model, usually the raised details, to apply dynamic highlights that really help a model stand out.
· Wet blending
This one is definitely for our confident modellers! Wet blending is a technique which allows you to create a natural gradient, by painting one colour on first and then gently layering a slightly lighter one over the top, before it completely dries. It creates a very realistic illusion of lighting on the model. This definitely requires a deft hand, lots of patience, and plenty of practice as you want the colours to blend together as seamlessly as possible. We recommend trying to wet blend some colours on your palette or another flat surface first, just to see how you get on before trying it on your model.
· Stippling
This is another technique which requires an old hasbeen of a brush, as it’s better to get a little rough with it. Much like dry brushing, you only use a little bit of paint here and gently dab the surface of your model to get a dotted effect. For this, you want a stiff-haired brush to create a rough and weathered look. This technique is ideal for creating textured textiles or dotting a bit of mud or blood onto your model.