Welcome to this latest edition of our Workbench blog and all the news, updates and modelling exclusives from the fascinating world of Airfix.
We have some rather exciting news for Airfix fans with the publication of this latest blog, as we have decided to move Workbench to a new weekly publication schedule. When we originally posted our first blog back in the summer of 2015, the intention was to post a new edition every four weeks, but as we got into the swing or things and our audience continued to grow steadily, these plans were quickly revised. With so much information to bring readers and with a seemingly endless appetite for all things Airfix, it was decided that a fortnightly release schedule would be most appropriate, something we moved to the following year. From that date until now, Workbench has been published every two weeks, so as we now find ourselves in the seventh year of production, a frequency change is actually quite a big deal. The intention is that we continue to bring you the same great Airfix content, just in a slightly shorter format, but to do so each and every week. This will be trialled for the rest of this year and we will take a view on it then, but please do feel free to let us know your opinion on the matter, as our readers views are extremely important to us.
Before we get started on this first weekly edition of Workbench, we would first like to discuss the subject of next month’s IPMS Scale ModelWorld show at Telford. Unfortunately, we will not be exhibiting at this year’s show, however, we do hope everyone involved in organising the show and particularly everyone who attends this year, will have a fantastic time at what is a truly memorable event. The entire Airfix team look forward to the next Scale Modelworld show almost as soon as the current event has ended and whilst we are disappointed not to be catching up with modelling friends old and new this year, we do very much look forward to taking our place in the exhibition halls once again. As always, Workbench will inform readers of our future plans as soon as we are in a position to do so.
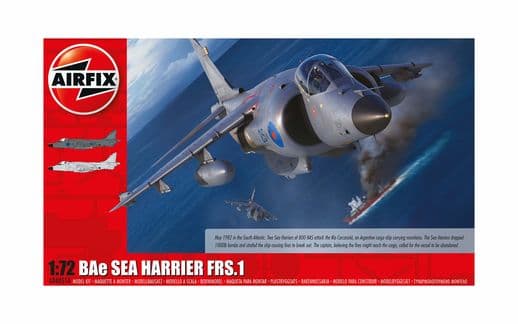
Right then, on with the subject of our first weekly edition of Workbench, the incomparable British Aerospace Sea Harrier FRS.1.
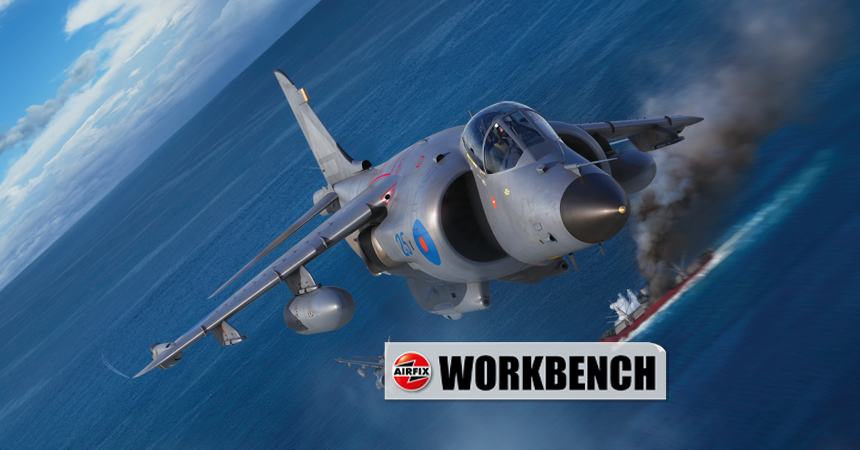
This exciting image has been produced to support the future release of our next BAe Sea Harrier FRS.1 kit in 1/72nd scale and commemorates a British strike operation against an Argentine supply ship during the Falklands War of 1982.
For the vast majority of the population in Britain during the early 1980s, if you were to ask them ‘Where in the world would you find the Falkland Islands and what was their connection to the UK?’, most would probably struggle to give you an answer, however, that situation would change from the late Spring of 1982. A long held international dispute over the sovereignty of this self-governing British Overseas Territory in the South Atlantic erupted into conflict following a change of government in Argentina and much more belligerent attitude towards the Falklands question. The raising of an Argentine flag by a salvage team landing on the islands in March 1982, followed by an amphibious landing at the beginning of April were the catalyst for war and one of the most serious international incidents of the post WWII era. Soon, the entire world would be only too aware of the Falkland Islands and how much they meant to Great Britain.
For readers who were children of the 1960s, stories of the great fighter pilots of the Second World War were undoubtedly a big part of our youth and didn’t actually seem to have taken place all that long ago. The lasting impression these men made on us was only made more significant by the fact that many of them appeared in person on documentaries and chat shows talking about their wartime exploits, with heroes like Douglas Bader and Johnnie Johnson even appearing on ‘This is your life’. Despite this, the stories which captivated us so were retrospective recollections, but during May and June of 1982, deadly aerial combat was taking place on our television screens, with a new era of fighter aircraft being piloted by a new breed of ace pilots.
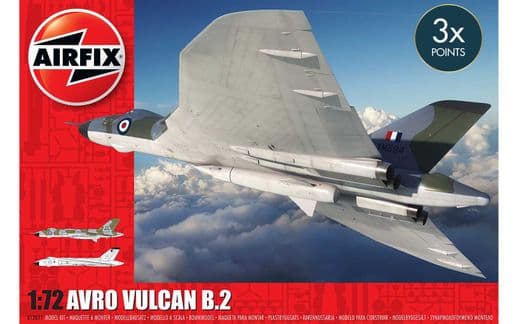
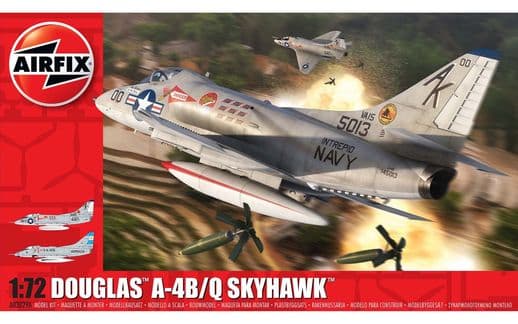
More classic Airfix Falklands Air War inspired box artwork from ranges past.
When we now look back at the Falklands War, it is clear to see just how perilous a situation this was for Britain and how history could have played out very differently. Significantly, it seems as though despite all their posturing and provocation in mounting an amphibious assault, the Argentineans didn’t really want war and were surprised and dismayed to watch Britain preparing and then dispatching a powerful naval Task Force to re-take the Islands. Britain itself was in a period of austerity, with cuts to the armed forces making any response to events happening more than 8,000 miles away very much touch and go, however, their military were extremely professional and well trained and to them, if there was a will, there was also a way.
Britain’s naval Task Force consisted of 127 vessels, headed by the two aircraft carriers Hermes and Invincible and providing the crucial air defence of this force were just 20 (initially) of the Fleet Air Arm’s Sea Harrier jets, the navalised variant of the VSTOL Harrier which had been in service for four years at that point. As the force left Portsmouth and steamed for the South Atlantic, how could this small force of Sea Harriers possibly stand a chance against an Argentinean air armada which numbered at least 100 serviceable aircraft and possibly as many as 170 in a worse case scenario. The odds facing them were arguably much greater than those facing the ‘Few’ of the Battle of Britain some forty-two years earlier.
Scheme A - BAe Sea Harrier FRS.1 XZ459/25, HMS Hermes Air Group, ‘Operation Corporate’, South Atlantic, May/June 1982.
The Fleet Air Arm introduced the navalised variant of the Harrier into service just short of ten years after the RAF had taken delivery of their first Harrier jets, but whilst the Royal Air Force were using their aircraft as a hugely successful strike and close air support aircraft, the Navy needed their Harrier to be an effective fleet defender. With the retirement of the Navy’s large aircraft carriers, along with their Sea Vixen and Phantom jets, the diminutive Harrier presented them with a viable fixed wing jet aircraft and one which was both versatile and extremely capable. Well suited to life aboard a smaller British carrier, the Sea Harrier was tasked with providing Fighter, Reconnaissance and Strike support for the fleet and its crews trained exhaustively in the art of modern aerial jet combat.
Despite the fact that Sea Harrier pilots were facing odds approaching 10:1 against them when heading down to a potential Falklands showdown, they were supremely confident not only in their own abilities, but also those of their aircraft, one which was equipped with the latest US produced AIM-9L Sidewinder air to air missile. In combat trials during their exhaustive training, Fleet Air Arm pilots flying the Sea Harrier against all of the current Western jets in service proved the excellent fighting qualities of their aircraft, and under the most rigorous of controlled mock combat situations, managed to post some impressive results. Against such aircraft as the Phantom, the Sea Harrier managed to ‘out-combat’ the Phantom by a score of 24:1 and even when pitted against the US F-15, an aircraft which was widely regarded as the ultimate air superiority fighter of the day, the Sea Harriers were reputedly coming out on top by a score of 3:1. Crucially, Sea Harrier pilots were completely aware of their aircraft’s strengths and weaknesses and were determined to give a good account of themselves in combat. As for the Argentinean military, they had a huge respect for the Sea Harrier and knew their airmen would be coming up against an extremely capable adversary.
This lead scheme option and the one which inspired the artwork which will grace the box of this impending release, will allow modellers to produce a scale example of this Falklands aviation classic and one which was as capable of performing strike attacks, as it was defending the ships of the Royal Navy.
The full scheme details for Sea Harrier FRS.1 XZ459/25, which was involved in the attack against the Rio Carcarañá on 16th May 1982.
With Argentine forces dug in to positions around the Falkland Islands, one of the most critical aspects of the Falklands conflict was the enforcement of the British declared Total Exclusion Zone around the Islands. Knowing that any aircraft or vessel entering this zone was likely to be hostile and now in a war zone, they also knew they were a legitimate target and could come under attack without further warning, something which highlighted the seriousness of this escalating situation. Argentinean troops stationed on the Falklands would have to be supplied by sea, so a crucial part of the British battle plan would be to ensure this didn’t happen.
On 16th May 1982, patrolling British aircraft spotted the Argentine supply ship Rio Carcarañá heading for the Islands and whilst they would not have been able to definitively ascertain its cargo from the air, it was actually carrying munitions and other military hardware destined for the forces stationed on the Falkland Islands. Continuing to steam for the Islands despite being detected, the sighting was reported to the Task Force Flagship HMS Hermes and two Harriers were readied to launch an immediate attack. Taking off from the carrier’s deck at around 16.00, the two Sea Harrier FRS.1 jets were XZ459 and XZ494, with each carrying two 1,000lb retard bombs and a full load of ammunition for their 30mm Aden Cannon.
Attacking the Rio Carcarañá at speed, the pair (which included Sea Harrier XZ459) managed to place two bombs in the hull of the ship, before making several strafing runs against the now blazing ship. With the fires threatening to engulf the ship and detonate its volatile cargo, the captain gave the order for his crew to immediately abandon ship, taking to the ocean leaving the stricken vessel to flounder on the water. Miraculously, the fires burnt themselves out without causing the expected explosion and the Argentinean Navy were later able to recover the vessel and tow her to Fox Bay. On inspecting her cargo, nothing was found to be in a usable condition, confirming that the Sea Harriers had done their work - the ship was simply left to her fate, which would be destruction at the hands of the Royal Navy on 24th May, at the hands of two Sea Skua missile equipped Lynx helicopters.
Following her service during the Falklands Conflict, Sea Harrier XZ459 was later upgraded to FA2 standard, the final variant of this magnificent Fleet fighter. She is now one of the prized exhibits at the Tangmere Military Aviation Museum, a true aviation combat veteran from a conflict which took place 8,000 miles away, 40 years ago next year.
Scheme B - BAe Sea Harrier FRS.1 XZ458/007, HMS Invincible Air Group, ‘Operation Corporate’, South Atlantic, May/June 1982.
From the modeller’s perspective, one of the most fascinating aspects of the Falklands Air War and the mammoth logistical challenges facing the British Task Force was the general presentation of the Sea Harriers based aboard HMS Hermes and Invincible. Initially made up of aircraft from Nos.800, 801 and 899 Naval Air Squadrons, the Sea Harriers seen on the decks of the two carriers as they left Portsmouth harbour at the start of their epic 8,000 mile journey were still wearing their standard FAA schemes of gloss extra dark sea grey upper surfaces and white undersides, complete with their colourful unit markings. From 10th April, all aircraft started receiving low visibility paint modification, which saw the white undersides overpainted with extra dark sea grey and the roundels having their white centre painted over in roundel blue.
This work was not carried out in exactly the same manner aboard both ships, as the aircraft carried by Hermes applied their paint using brushes, whilst paint teams on Invincible used spraying equipment to complete the job. It would later transpire that the paint applied by brush much harder wearing in operation and how some of the aircraft spray painted on Invincible appear to have slightly lighter undersides on photographs taken at the time. Obviously, all the flamboyant tail markings also fell victim to the application of extra dark sea grey paint.
This was not the only Sea Harrier paint anomaly of interest to the modeller during the Falklands Campaign. As the Fleet Air Arm rushed to provide additional aircraft and pilot reinforcements for the coming conflict, they gathered suitable aircraft currently in storage and those assigned to other duties and prepared them for operational service. Assigned to a reformed No.809 NAS, during this intense period of training and operational work-up, the aircraft were painted in a different low visibility scheme of satin medium sea grey, with barley grey lower wings. In addition to this, these aircraft also sported even lower visibility roundels featuring pale blue and red paint, which could even be described as a little opaque in appearance. These were only carried either side of the forward fuselage, with no wing marking used either top or bottom.
It is also interesting to note that whilst the colours for these schemes were being perfected at Farnborough, a team of model builders were commissioned to produce several 1/24th scale Airfix Harrier Super Kits, so they could assess the visual effectiveness of each proposed scheme on the largest Harrier model available at that time.
The modified container ship Atlantic Conveyor was commandeered to transport essential equipment and stores to the battle zone, including Chinook and Wessex helicopters, along with 8 Sea Harriers (of the reformed 809 NAS) and 6 Harrier GR.3s. The Chinooks would be Britain’s only heavy lift helicopters in the South Atlantic and the Sea Harriers were needed as cover for expected combat losses during the coming conflict. The Harriers would not be loaded on the vessel prior to her sailing from the UK, as training and preparation was ongoing - they would be meeting her at Ascension Island.
The aircraft which were delivered to the Falklands Task Force from the deck of the Atlantic Conveyor looked very different from the ones which set sail aboard the British carriers leaving Portsmouth at the beginning of April 1982.
Following work-up at RNAS Yeovilton, the Sea Harriers (6 first, with two others following on) were to be flown to Ascension Island via Banjul (The Gambia), with the support of RAF Victor tankers from Marham. The aircraft would take on fuel ‘little and often’ during the transit flights, ensuring that should any plane need to make an emergency divert, they would have enough fuel to do so safely. With all aircraft safely on the ground at Wideawake Airfield on Ascension Island by early May 1982, all eight of the Sea Harriers made vertical landings on the deck of Atlantic Conveyor on 6th May and prepared for their onward journey to meet up with the Task Force.
On the 18th and 19th of May, all eight Sea Harriers had flown off the Conveyor and to their assigned carrier, with the transfer of the 6 GR3s being completed by the following day. Mistaken for one of the British carriers, Atlantic Conveyor was struck by two Exocet missiles fired from Argentinean attack jets just five days later, with all remaining aircraft stored on the ship destroyed by the resultant fire - thankfully, the Sea Harriers/Harriers and a solitary Chinook were not amongst this number.
Sea Harrier FRS.1 XZ458 would go on to fly 45 operational sorties during the Falklands conflict and would be piloted by such famous names as ‘Sharkey’ Ward, Ian Mortimer and Dave Braithwaite, but without scoring any confirmed victories. On return to the UK, the aircraft spent some time in storage, before being destroyed in a crash following a bird strike near Fort William, with the pilot thankfully managing to eject successfully. It seems as if a Scottish seagull managed to do what the combined might of the Argentinean Air and Naval Air Forces could not.
A really important aircraft in the history of British aviation, the details behind the two scheme options to be included in this forthcoming kit release illustrate how this navalised variant of the Harrier was just as adept at strike operations as it was at protecting the Fleet from air attack. For Britain’s Falklands Task Force, this was perhaps just as well, because the logistical and military challenges facing them if they were to successfully re-take the Falkland Islands were daunting and their relatively new Sea Harriers would be forced to take on and prevail against much greater numbers of Argentinean fighters. The conflict would prove to be a defining moment for the legacy of the Harrier and more specifically, the Sea Harrier. It also helped to underline the importance of effective naval air power and how the Royal Navy was still the most effective force in allowing Britain to maintain her international influence.
Keep a lookout for this stunning box artwork during the 40th Anniversary year of the Falklands Conflict in 2022.
This new BAe Sea Harrier FRS1 kit (A04051A) is scheduled to be released early in the new year and in time for modellers to make their own Fleet Defender scale tribute to this hugely effective fighting aeroplane and its impressive performance during the Falklands Conflict.
We are afraid that’s all we have for you in this latest edition of the new style Workbench blog, a format we hope you are going to enjoy As always, if you have any suggestions for particular subjects you would like to see covered in a future edition, please do drop us a quick line, using this workbench@airfix.com link to contact us.
Please check our various official social media sites for all the latest Airfix developments and we will be back with more Workbench features at the same time next week.
Thank you for your continued support of our Airfix blog.
