Welcome to this latest edition of our Workbench blog and all the news, updates, and modelling exclusives from the fascinating world of Airfix.
Although the majority of media attention appears to be directed towards commemoration events marking the 80th anniversary of VE Day in May this year, 2025 will also see the nation marking the 85th anniversaries of the Battle of France, the miracle of Dunkirk and the Battle of Britain, in what may well be the last major commemorations of all three until their centenary in 2040. In this latest edition of Workbench, we will be marking a rather specific re-introduction into the current Airfix range, one which will serve as our 1/72nd scale tribute to several of the aircraft which contested the Battle of Britain throughout the summer of 1940, our Battle of Britain Gift Set. With the first consignment of kits scheduled to arrive in our warehouse during the next week or so, we will be looking at why we think this is destined to be one of the most popular kit offerings in the entire 2025 range.
Featuring everything you would expect within one of our Workbench release updates, we will be bringing you box artwork, scheme details and information behind the individual aircraft which inspired their inclusion in this fantastic kit release, one which will allow us all to replicate the frenetic air duels above southern Britain during the summer of 1940 in our very own display cabinets. We will also be attempting to bring some historical context to the Battle of Britain and significantly, the weeks and months which preceded it, just so we can have a better appreciation of how vital this period in the war was for Britain, Germany and the wider world.
It's an Airfix ‘Squadron Scramble’ as we focus on the Battle of Britain in this latest edition of Workbench.
The RAF deployed Hawker Hurricane and Gloster Gladiator fighters to France prior to the German invasion in May 1940.
The effectiveness of the German onslaught through the Low Countries and into France during 1940 proved to be a sobering experience for Allied Forces on the continent. Although relatively evenly matched, the German attack was pressed home with lightning speed and with a new level of coordination between air and ground forces, something which proved so devastatingly effective that the Allies hardly stood a chance. Destroying many more British and French fighters on the ground than they did in the air, Blitzkrieg was intended to confuse and disorientate everything in its path, be they civilians fleeing the fighting, or Allied forces attempting to mount their own coordinated response to the attack.
With the British and French air forces often returning to airfields which had been put out of action whilst they were engaged in their latest sortie, or may even have been under attack at the time of their return, the situation was so fluid in France that any chance of a concerted aerial defence was always subject to constant disruption, not to mention the constant attrition of combat.
Britain and France had signed a pact which assured mutual military support in the event of aggression against either country, and resulted in the Advanced Air Striking Force being sent to France on the 2nd September 1939. Intended to support the French Army in deterring, and hopefully repelling any hostile enemy incursion into the nation, this force initially consisted of 12 squadrons of aircraft, 10 equipped with the Fairey Battle light bomber and 2 equipped with Hawker Hurricane fighters.
Just two days later, the British Expeditionary Force sailed across the English Channel as part of the same agreement, with their operations covered by the Air Component of the BEF. This force comprised of a further 4 fighter squadrons equipped with Hurricanes and Gloster Gladiator biplanes, with 4 squadrons of Westland Lysanders in an army cooperation role, and 4 squadrons of Bristol Blenheims as strike bombers and reconnaissance aircraft.
This show of force was intended to prevent a further escalation of hostilities by making the aircraft available within striking distance of targets inside German territory should such actions be required, however, Allied military planners initially decided against taking such offensive actions for fear of provoking Germany into a military response, something they were clearly trying to avoid. As a consequence of this decision, when war inevitably came during May 1940, the RAF airmen based in France would have to face the full fury of Blitzkrieg and the most modern, supremely confident air force the world had ever seen.
Arriving in France on 8th September 1940, the Hurricanes of Nos 1, 73, 85 and 87 Squadrons were sent in advance of much of the ground force contingent (and indeed their own airfield support), so the aircraft could fly defensive patrols over French ports, as large numbers of vessels laden with men and equipment were being unloaded there. What followed next was a strange period of uneasy international tension and military posturing, a period which became known as the ‘Phoney War’, and one which saw French based RAF squadrons performing months of flight operations which consisted mainly of reconnaissance and training sorties. As we now know, this was the calm before a literal military storm.
Air operations covering the Dunkirk evacuations continued to take a heavy toll of aircraft on both sides, in advance of the Battle of Britain erupting.
This uneasy calm was shattered by the German onslaught which began on 10th May 1940, and continued until the surrender of France just six weeks and one day later, a period which brought with it untold devastation which shocked the world, and was surely just the precursor to Germany taking control of much of Europe. But did German forces have it all their own way in France, and whilst Hitler enjoyed a period of sightseeing in Paris, where his forces truly prepared for a strike across the English Channel.
The losses suffered by the Royal Air Force during the French campaign were indeed grievous, and would leave them perilously exposed when it came to defending Britain’s airspace in the face of the oncoming Luftwaffe onslaught. Having said that, the RAF and Armée de l’Air did take a heavy toll of Luftwaffe aircraft during the Battle of France, a factor which made the coming attack against Britain much more difficult than it could have been. Contrary to popular belief, the Luftwaffe actually lost somewhere in the region of 1800 aircraft destroyed or damaged over France, a figure which represented 36% of their total strength at the time.
In contrast to this, the air campaign over France (including Dunkirk air operations) had been equally costly for the Royal Air Force. They had lost just under 1000 aircraft and a great many skilled pilots during this period, losses which would be hard to make good, at what was the most significant period in the nation’s recent history. The French Air Force had lost approximately 1400 aircraft of all types, many of which had been destroyed on the ground by German bomber attack, with the combined air forces of Holland and Belgium losing a further 300 aircraft destroyed.
Operation Dynamo, or the ‘Miracle of Dunkirk’ as it came to be known, saw a maximum effort being mounted by the Royal Air Force, not necessarily to diminish the fighting capabilities of the Luftwaffe, but more to keep them occupied and away from the evacuation beaches, whilst an incredible 338,000 troops were rescued and brought back to Britain. Although the loss of all their equipment in France was devastating for the military, snatching this victory from the very jaws of defeat was a significant achievement under extreme circumstances, but could it be a fighting catalyst for what Britain was surely about to face in the weeks and months ahead.
The Supermarine Spitfire and its brave pilots would forge an enduring reputation during the savage air fighting over southern England during the summer of 1940.
As the last of the RAF’s Hurricane fighters which were able to make it back from France, landed back at their home airfields in Britain and the last ships had left the Dunkirk area, Fighter Command took stock of their fighting strength. Initially at least, that situation was desperate, with just an estimated 750 fighter aircraft available, with only 520 of these being available for combat operations.
Facing them, the Luftwaffe’s air armada totalled around 3,000 aircraft, and despite their losses over France, their pilots were supremely confident and desperate to test themselves against the Royal Air Force. Germany was at the peak of its military powers and whilst they appeared to be delaying their all-out onslaught somewhat, this didn’t seem to matter, as victory would surely be theirs. Essentially, the Luftwaffe needed to destroy Fighter Command and achieve air supremacy before a risky cross-Channel amphibious assault could be mounted, although many in the German high command were of the opinion that the destruction of the Royal Air Force would see Britain suing for peace, but on Germany’s terms.
Flushed with their airborne successes to date, Luftwaffe Commander in Chief Hermann Göring boasted to Hitler that his fighters would sweep Britain’s skies of the Royal Air Force, and how his bombers would level RAF airfields in a matter of days. He ordered all available forces to be moved to airfields as close to the northern coast of France as possible and prepared to order the attack. Those first skirmished were like two boxers sizing each other up, and consisted mainly of operations attacking shipping in the English Channel, with the Luftwaffe trying to tempt Fighter Command into larger scale combat.
In Britain, although they knew the German onslaught was coming, this delay in all-out combat was fortuitous to say the least. Although bloodied, Fighter Command were certainly not out, and were rebuilding at an impressive rate. By the time the Luftwaffe mounted their first major raids, Fighter Command’s strength of available aircraft had effectively doubled to 1000 fighters, and they also had their own champion, Air Chief Marshal Sir Hugh Dowding. Dowding was a pragmatic man who took his responsibilities for the defence of Britain seriously, preventing Spitfires from being sent to France and championing the use of RADAR, new technology which would be the electronic eyes of Fighter Command.
In addition to organising the production and renovation of fighter aircraft, Dowding’s masterstroke was the establishment of an integrated air defence system, something which ensured that fighters were in the air when and where they were needed most, and not having to mount wasteful and strenuous standing patrols for their pilots.
With aircraft being prepared on both sides, for the first time, Luftwaffe airmen would be operating at a disadvantage. The English Channel would be a significant natural barrier for them, meaning that fighters would have limited time over Britain if they were to make it safely back to their bases, and if they suffered combat damage, were shot down, or had mechanical issues with their aircraft, it was highly likely that the war was over for them.
With a determined and organised Royal Air Force waiting for them, it wouldn’t take long before losses started to mount and wranglings within the force would begin to undermine the confidence Göring had boasted to Hitler about. Would Dowding, or Göring make the better preparations, and who would emerge victorious?
Ultimately, as the world watched this mighty clash of war eagles, the outcome of the battle would be decided by the brave airmen of Britain and Germany, along with the vital support network behind them. Everything was in the balance, and a few relatively small developments may well decide the ultimate fate of Europe. Facing incredible odds against them, could the young airmen of Britain, the Commonwealth and the rest of the free world stand against the all-conquering might of the Luftwaffe?
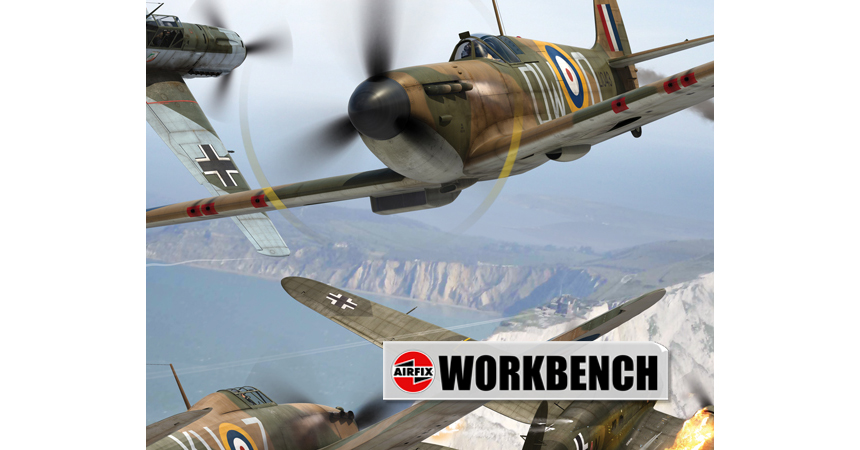
Box artwork created for this Battle of Britain Gift Set release, one which features four separate Battle of Britain related aircraft kits in 1/72nd scale.
The above is just an attempt at setting the scene on the eve of the Battle of Britain, looking at the period immediately before it, and how the opposing sides prepared for conflict. We now come to the individual aircraft which contested this aerial duel, aircraft which have gone on to become household names in the decades which followed and aircraft types which are familiar to many millions of people all over the world. Clearly, one of the main areas of interest for these aircraft has been the scale modelling hobby and over the years, and all manufacturers have accessed this rich subject area when producing model kits for their ranges, kits which always prove to be amongst the most popular in any given year, but particularly in a significant anniversary year.
With writers, researchers and historians continuing to uncover and publish new material on the subject with each passing year, the aircraft which contested the Battle of Britain continue to be an enduring source of fascination, helping to not only preserve the details behind the aircraft which took part, but also the efforts and sacrifices of some of the bravest people to have ever gone to war. Deserving of our undying respect, modelling helps us keep the actions of these men alive and what they did for our nation in what must be considered to be our darkest hour.
Battle of Britain modelling inspiration has certainly been something of a feature of respective Airfix ranges over the years, with most catalogues/ranges featuring aircraft and scheme options which possess either direct links, or links by association to the Battle of Britain, and have always proved popular with the modelling community. That being the case, and with this year marking the 85th Anniversary of this famous battle, we have quite a few kits available which follow this theme, and certainly one entitled ‘The summer of 1940’, but also one intentionally re-issued to serve as our modelling tribute for the year, our 1/72nd scale Battle of Britain Gift Set.
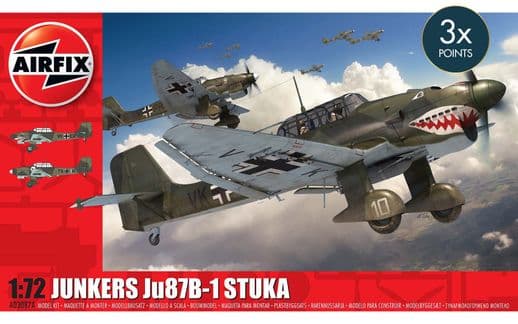
Featuring four different aircraft kits of types which took part in the aerial duel throughout the summer of 1940, this set includes the two main Fighter Command stalwarts, a mighty German bomber and its feared fighter protection, all wearing liveries appropriate for the Battle of Britain. Supplied with everything you will need to create your very own scale Battle of Britain tribute, the kit also includes an impressive display stand which allows all of your finished aircraft to be displayed together, with the poor Heinkel being bothered by a swarm of single engined fighters.
Let’s take a closer look at the individual scheme details included for each of the four aircraft now:
The Spitfire has earned a legendary reputation over the past 85 years or so, being recognised as one of the finest fighting aeroplanes ever produced by man, and one which represented the absolute pinnacle of aeronautical engineering when it first entered service, something which did create more than a few problems. The Spitfire was an advanced, all metal monoplane fighter, one which made use of all the latest advances in technology and manufacturing, but with the war clouds gathering ominously at the time, could Britain adapt to Spitfire production, and could they be produced in a timely manner?
Despite its undoubted prowess in the air, would the RAF have enough Spitfires in service by the time they were needed to defend the country? With an estimated 80,000 individual components needed to produce a Spitfire, the general complexity of Spitfire production required 13,000 man hours be spent in the production of a single aircraft. This figure was well over double the time needed to produce a comparable Hawker Hurricane fighter, and compared poorly to its main aerial adversary, the Messerschmitt Bf109, which only took the Germans 4,000 man hours to produce.
Thankfully, Spitfire production was completely reorganised to assure a steady stream of new aircraft for Fighter Command, including this aircraft, L1043. She was built by Vickers Supermarine at their Eastleigh plant with the construction number 258EA and sporting a Rolls Royce Merlin III engine and initially allocated to No.610 (County of Chester) Squadron at Wittering. Moving south to Biggin Hill to allow them to participate in the air operation covering the Dunkirk evacuations, the unit would suffer terribly at the hands of the Luftwaffe, as their inexperienced pilots executed battle tactics which were unsuitable for modern air warfare – they learned very quickly over the beaches of Dunkirk.
Full scheme details and a picture of the built Spitfire kit wearing these markings.
By the start of the Battle of Britain, and throughout much of the heaviest fighting, the Spitfires of No.610 Squadron were fully committed, providing a vital component of Britain’s attempt to defend its airspace. When Göring shifted the emphasis of the Luftwaffe’s attacks to RAF airfields, No.610 squadron fought valiantly in defence of their home airfield, and with the unit’s pilots becoming battle hardened by the day, they began taking a heavy toll of enemy aircraft.
After being committed to some of the heaviest fighting of the Battle, No.610 squadron and their Spitfires were later sent north to RAF Acklington for a period or rest, recouperation and reequipping, with its exhausted pilots having given everything they had in defence of the nation.
This particular aircraft was the subject of a famous air-to-air image taken whilst the Squadron were on patrol prior to the start of the Battle of Britain, an iconic picture of Fighter Command Spitfires at this most pivotal period in British history. This aircraft was later transferred to No.266 Squadron, but was struck off charge in August 1941, after hitting a tree whilst on approach to RAF Hawarden a few days earlier.
One of the world’s truly great fighting aeroplanes, the Messerschmitt Bf 109 would see service throughout the Second World War, and be flown by many of the world’s most accomplished fighter aces. Small, powerful and extremely well-armed, the Bf 109 was a hunting aeroplane and scored its most significant successes during the Battle when its pilots were allowed to roam the skies freely looking for enemy targets of opportunity as and when they presented themselves. When later forced to stay close to the bombers to provide protection, they lost their tactical advantage and became much less of a threat to the pilots of Fighter Command.
Carrying only enough fuel for around twenty minutes combat over London, the Messerschmitt Bf 109 was closely matched in fighting capabilities to both the Spitfire and Hurricane, with each aircraft possessing strengths and weaknesses in comparison to their contemporaries. The name Messerschmitt would come to stand as a colloquially used name to signify any German fighter aircraft, so synonymous was the aircraft with the Luftwaffe, Blitzkrieg and the Battle of Britain, a fearsome aeroplane dedicated to imposing its will on any contested airspace, including the skies over southern England.
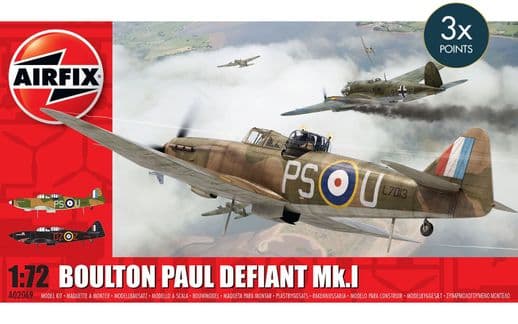
With a name like Werner Pichon-Kalau von Hofe, as a fighter pilot, you really did need to be rather good at your craft, if you were to avoid the ridicule of fellow pilots in your unit, but thankfully for him, von Hofe began making a name for himself early on during the Battle of Britain. Led by celebrated ace pilot Johannes Trautloft, the Messerschmitt Bf 109 fighters of III./JG 51 were conducting a ‘Freie Jagd’ sortie along the southern coast of England on 19th July 1940, when they intercepted the Boulton Paul Defiant turret fighters of No.141 Squadron, the first time they had been committed en masse by Fighter Command during the battle.
Scheme details and a built sample finished in this mount of a Luftwaffe Battle of Britain ace pilot.
The German fighters mauled the Defiants, with relatively inexperienced Werner Pichon-Kalau von Hofe claiming three of the British fighters in a short period of combat. The Defiant unit lost six of its nine aircraft during this engagement, prompting Fighter Command to withdraw these aircraft from daylight combat operations wherever possible, as their crews were simply incapable of defending themselves against a determined enemy fighter opposition. Von Hofe would go on to become a Battle of Britain ‘Ace’, claiming three more victories by the end of October, all Spitfires.
Underlining the fact that the Battle of Britain took a heavy toll on both sides, Werner Pichon-Kalau von Hofe was in need of a lengthy period of rest and recouperation following the battle, as he was suffering from combat fatigue, and when returning to duty, did so on the Eastern Front. He would survive the war with 21 confirmed victories, at least two of which were scored against Soviet Curtiss P-40 fighters.
Although clearly an accomplished pilot, von Hofe is remembered as a Luftwaffe pilot who left the world with a fascinating record of German air operations during the Second World War, as he was an avid photographer and talented cinematographer, taking every opportunity to take pictures and films of the men and machines of his unit JG51. The footage is fascinating as it was taken by an ordinary fighting man who was enjoying his hobby, rather than a production which had passed through the hands of the German propaganda machine.
Often unfairly portrayed as the ‘Other’ RAF fighter taking part in the Battle of Britain, and the one which played a supporting role to the Spitfire, at the outset of the Battle of Britain, the Hawker Hurricane was the most numerous British fighter available to Fighter Command, and one which would be fully committed throughout the entirety of the battle. Despite being viewed as inferior in capability to the Spitfire, particularly by the Luftwaffe, the Hurricane would actually prove to be Britain’s most effective weapon during the Battle of Britain, responsible for shooting down more Luftwaffe aircraft than the rest of Britain’s defences combined, a statistic which included the much heralded Spitfire.
A reliable and extremely capable fighter, one of the Hurricane’s most impressive attributes was how it proved to be a very stable gun platform, and if a pilot was able to gain a good shooting position, how the Hurricane’s eight Browning machine guns could do some significant damage. This ability was well liked by Hurricane pilots and those who had time on both the Spitfire and the Hurricane often commented on how much they appreciated the firing stability of the Hawker fighter, one which saw many a Luftwaffe aircraft falling to its guns.
Another vital attribute of the Hurricane was how it utilised traditional/existing methods during its construction, making it almost three time quicker to produce a new Hurricane than it was a Spitfire, and allowing damaged aircraft to be repaired or patched up much more effectively, and often on its home airfield. When Britain needed it most, the Hurricane was in the air and fighting, as opposed to being in the repair shop.
As Fighter Command prepared to face the might of the Luftwaffe during the Battle of Britain, the Hurricane formed the backbone of Britain’s defence. There is still some debate regarding the actual squadron strength available to Fighter Command at this crucial time, however, it’s generally accepted that there were 29 squadrons of Hurricanes, 19 squadrons of Spitfires, 6 squadrons of Blenheims and 2 Boulton Paul Defiant units preparing to face the might of the Luftwaffe.
Often the unsung hero of the Battle of Britain, where would Fighter Command have been without the Hawker Hurricane!
In opposition, the Luftwaffe was unquestionably the most feared air force the world had ever seen, boasting battle hardened aircrews and massive numbers of aircraft allocated to the task – they were also supremely confident, thinking it was just a matter of time before they smashed the Royal Air Force. At the beginning of the battle, that disparity in aircraft numbers favoured the Luftwaffe by almost 4 to1 and on paper at least, the outcome of this mighty aerial clash was only too clear for all to see. Thankfully for Britain, the battle would not be fought on paper, and the pilots of Fighter Command were not only confident of their own abilities, but were also fighting for the future of their country, their loved ones and everything they held dear. Could they give the Luftwaffe an unlikely bloody nose?
This particular Hurricane was built by Hawkers at Brooklands as an early fabric winged Hurricane. Although her initial service history is a little hazy, she is known to have fought during the Dunkirk evacuations and the Battle of Britain. During combat operations on 17th August 1940, she was attacked by Messerschmitt Bf 109 fighters whilst on patrol, with her pilot having to make a forced landing close to the RAF airfield at Croydon. She was subsequently repaired and returned to service, but by the end of the war, was sent to RAF Sealand and allocated for museum use.
Fully restored by Hawkers at Dunsfold in the 1960s, she was returned to her original Battle of Britain RAF No.615 Squadron markings and can currently be seen suspended from the roof of the Science Museum in London. She is thought to be one of the only original examples of an early fabric winged Hawker Hurricane in existence.
Aircraft D – Heinkel He 111P-2 G1+AN, 5./Kampfgeschwader 55 ‘Greif’, Villacoublay, France, 1940.
90 years ago this year, the world witnessed one of the most worrying developments in aviation history, with the first flight of an aircraft which would soon become synonymous with the Luftwaffe and its terrifying bombing campaigns across Europe, the Heinkel He III. Designed and produced in contravention of the Treaty of Versailles, this aircraft was without doubt something of a ‘Wolf in sheep’s clothing’, an aircraft which may have been masquerading as a civilian airliner, but was one bred for war. In the fullness of time, the name ‘Heinkel’ would come to be used as a colloquial term in reference to all German bomber aircraft from the Second World War, and more than 6,000 of these bombers would subsequently be constructed in all variants.
It will come as no surprise to learn that the Heinkel He111 would make the transition from pretend airliner to medium strike bomber with relative ease, becoming Germany’s main strike bomber throughout the Battle of Britain and able to operate either by day or night – it was also responsible for dropping the heaviest tonnage of bombs on Britain during the battle. A particularly robust aircraft, the He111 was able to absorb significant punishment and still make it back to its home airfields in Northern France, which was perhaps just as well, as the fighters of the Royal Air Force were relentless in the defence of their homeland. With a relatively modest 2,000kg bomb load, the Luftwaffe’s Heinkels were forced to make multiple sorties against British targets, something which made them increasingly vulnerable to Fighter Command attack, particularly when the British finally started to gain the upper hand.
This particular aircraft serves as a fine representation of the Luftwaffe strike bombers which were hurled against Britain during the summer of 1940, with this one also serving through the French campaign which preceded it. During the Battle of Britain, fifteen Gruppen of Heinkels were allocated for operations over Britain, mounting their first major raid over mainland Britain on the night of 18th/19th June 1940. They struck oil service depots and airfields in south-east England, losing six bombers during the operation.
The largest aircraft in this Gift Set collection, the Heinkel He III was the Luftwaffe’s main strike bomber during the Battle of Britain, with 15 Gruppen allocated to operations against England.
Interestingly, the Heinkel possessed the range to strike Britain from bases in Norway and Denmark, meaning that much of the East coast of the UK was in their range. Unfortunately, that extended range meant that they would be operating without the protection of friendly fighter cover, with Luftwaffe planners gambling that RAF fighters would be concentrated on repelling the major raids taking place to the south, therefore leaving the north unprotected. Their gamble backfired and Heinkel crews suffered terribly at the hands of Fighter Command.
As the Battle of Britain continued to rage, the Luftwaffe’s Heinkel units became increasingly vulnerable to RAF fighter attacks, losses which led to Göring ordering his fighters to stick steadfastly with the bombers to provide protection for them. This proved to be the first signs of the German plan unravelling and whilst there was much fighting still to be done, Fighter Command started to believe that they had a fighting chance of prevailing, even though there were still some dark days ahead.
On 25th September 1940, the massed Heinkels of KG55 attacked the Bristol Aeroplane Company facility at Filton with devastating effectiveness and the following day, did the same at the Spitfire manufacturing plant at Woolston. Thankfully by this stage, Spitfire production was dispersed across a wide area, so disruption to aircraft production was minimal.
Despite being one of the most famous Luftwaffe bomber units of the Second World War, KG55 suffered terribly at the hands of Britain’s combined defences during the summer of 1940, but would remain operating from Villacoublay airfield, just south of Paris, as the Battle of Britain moved on to the Blitz. They would only be relieved when posted to the Eastern Front in June 1941, which crews must have been delighted about. They had mounted bombing operations against Britain for almost exactly one year prior to moving east.
This desirable kit comes complete with an impressive display stand, which allows all four kits to be displayed together.
For those of us with vivid imaginations, the mental images we can conjure up of large numbers of British fighters heading towards huge formations of Luftwaffe aircraft during the Battle of Britain is simply terrifying, and we can hardly comprehend how these young men had the bravery and fortitude to do it time and time again, perhaps until a Messerschmitt got the better of them. Although we were all fortunate enough to have not been required to follow in their footsteps, every single one of these airmen earned the respect and gratitude of the nation, and the rest of the free world for their efforts.
The kit featured in this latest blog update makes for a most suitable build project for any modeller looking to create their own scale tribute to the men and machines which took part in the Battle of Britain, and is relatively impartial in the fact that it features two pairs of aircraft which fought for either side. In this significant anniversary year, could there be a more appropriate kit offering for those wishing to produce a scale tribute to the tumultuous air fighting which took place in the skies above Britain during the Summer of 1940?
The first consignment of this impressive kit is expected in our warehouse by the beginning of next week, however, in view of the subject matter, we don’t expect this to be available for long. We do have a further supply due in time for the anniversary itself, however, we fully expect this to be one of the most popular releases of the year, and one destined not to be included in a future range until the next major Battle of Britain anniversary year.
We are afraid that's all we have for you in this latest edition, but we will be back next Friday with more project development updates and the very latest Airfix kit exclusives. In the meantime, we are always keen to hear your views on all things Airfix and in particular, any thoughts and opinions you may have regarding our Workbench blog. If you would like to drop us a quick line, could we please ask that you use our workbench@airfix.com email for all correspondence.
To re-visit any of the Airfix blogs we have produced over the past seven years or so, please head to our main Workbench hub, where you will find our entire blog back catalogue and all the Airfix design projects we have already covered.
All our dedicated official social media sites can be accessed by clicking the respective link icons at the foot of this page, or by heading to the Airfix homepage. Other useful Airfix links are:
Facebook, YouTube, Twitter and Instagram official sites
Please join us for more Airfix updates next week and thank you for your continued support.